Creating an inventory of building assets may sound intimidating if you’ve never done it before, but it doesn’t have to be complicated. It’s okay to start simple by creating a basic list of what assets you have and their condition.
While our Building Asset Inventory & Assessment Guide & Templates walks you through the entire process, including giving you templates that you can use to store the information if you aren’t yet using a CMMS for your building, I’m going to walk you through the basic steps.
To make this practical, let’s use the HVAC unit shown in the photos above as an example.

Step 1: Locate the Asset
This may sound obvious, but the first step is simply finding the asset and confirming where it is located. If this ends up harder than you thought it would be, you’re not alone. We’ve talked to many people who aren’t entirely sure how many assets they have or where they are located.
For HVAC equipment, that could mean walking the perimeter of the building, checking rooftops, mechanical rooms, courtyards, or fenced-in areas like this one.
As you build your inventory, location matters. Knowing where an asset lives saves time later when inspections, repairs, or replacements are needed.
Step 2: Identify the Make and Model
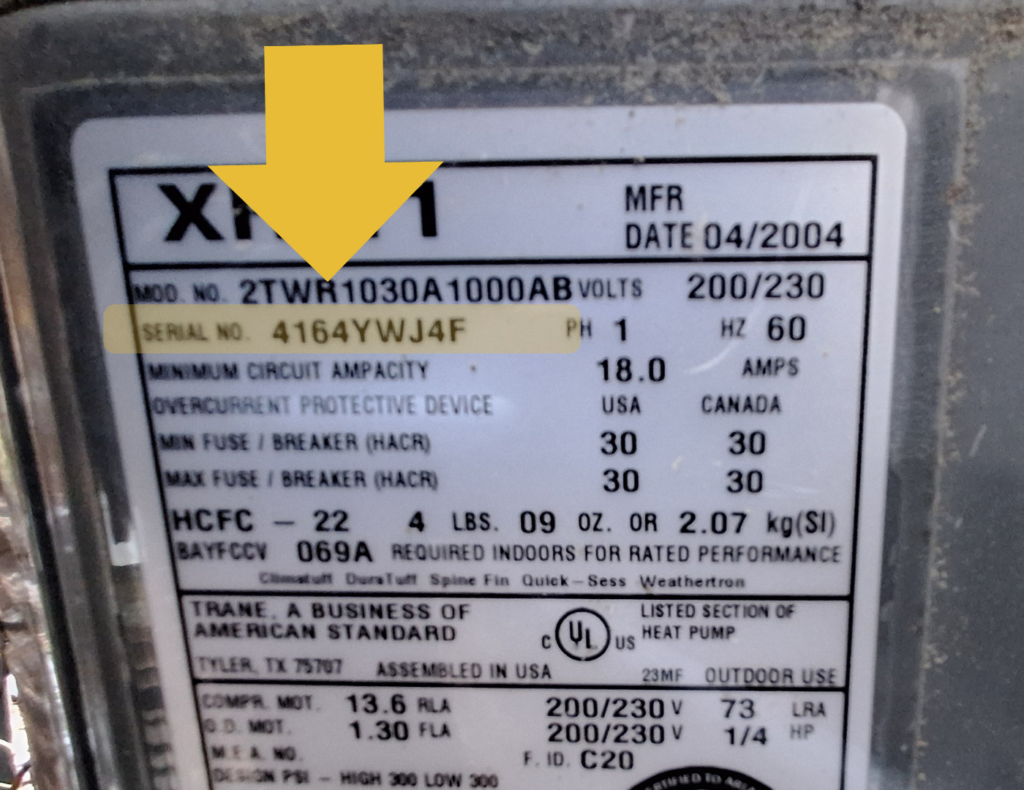
Once you’ve found the asset, look for the asset label to find the manufacturer’s name and model number.
On HVAC units, this information is typically found on a metal data plate or label attached to the side of the unit. In this example, the unit is a Trane XR11.

Documenting the make and model helps with:
- Finding manuals and specifications
- Ordering the correct parts
- Understanding expected performance and lifespan
Step 3: Document the Serial Number
The serial number is one of the most important pieces of information to capture.
It uniquely identifies that specific unit and is often required when working with service providers or manufacturers. Serial numbers also help confirm age when the manufacture date is not clearly listed.
Even if nothing else feels clear yet, writing this down is a strong first step.
Step 4: Document the Age
In many cases, the manufacture date is listed directly on the data plate. Often, it can be decoded from the serial number.
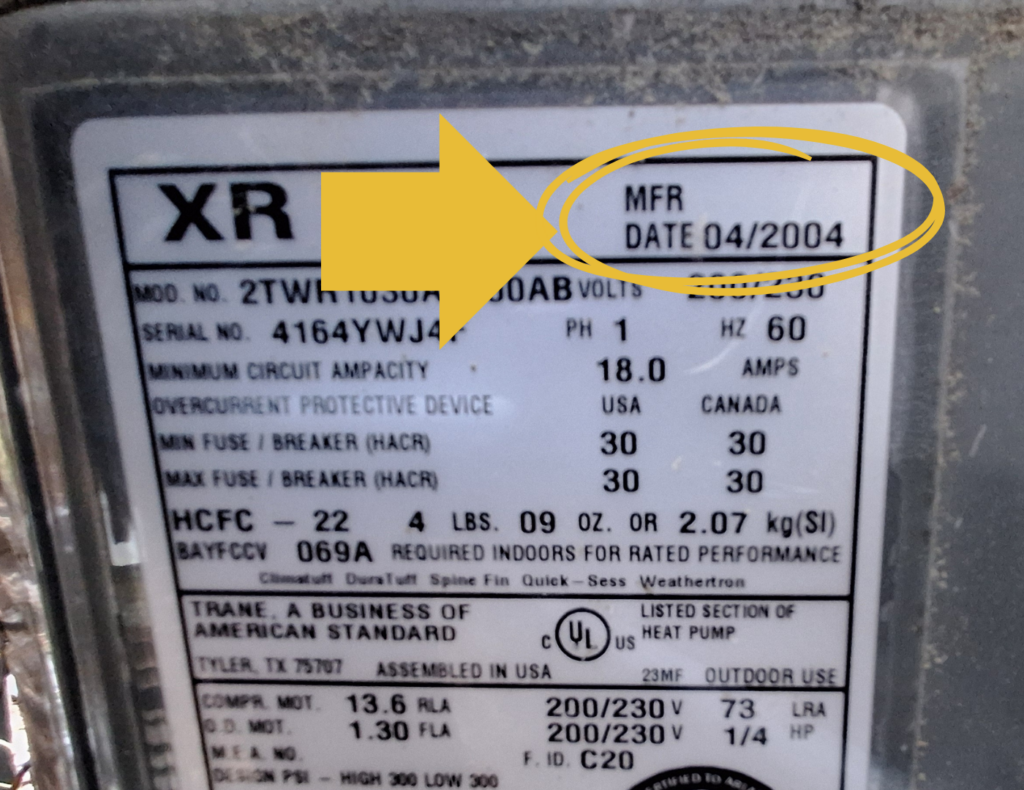
In the example shown, the manufacture date is listed as 04/2004, which immediately tells us this unit is past the average lifespan for most HVAC equipment (15-20 years).
This single data point is incredibly valuable. Age alone doesn’t mean failure is imminent, but it does tell you where this asset falls in the lifecycle and how urgently you should be planning ahead.
Step 5: Assess the Condition
This step does not require technical expertise. You are simply observing and documenting what you see and hear.
Ask basic questions:
- How does it look? Is there visible rust, damage, or debris buildup?
- How does it sound when running? Any grinding, rattling, or unusual noise?
- How has it been working? Has it required frequent repairs or struggled to keep spaces comfortable?
You are not diagnosing problems here. You are capturing observations that help paint a picture of the asset’s current condition.
A Simple Tip to Help Your Team
You can give each asset a name that is easier for everyone to identify and refer to in order to help your team out.
Instead of referring to each asset by its serial number, maybe you have HVAC #1 and HVAC #2 or Water Heater A and Water Heater B. Find an identification system that is easy, include it in your asset inventory, and make sure it stays consistent.
This small step makes communication clearer for staff, volunteers, and contractors.
What Comes Next
Once you have this information about all your assets, you can start working on creating a lifecycle replacement plan.
If you find one of your air handlers is already far past the average lifespan for an air handler, you know that it’s likely this unit will start to have problems if it isn’t already and will want to start planning and budgeting for an upcoming replacement.
That shift, from reacting to surprises to planning ahead, is where real stewardship begins.
Ready to See Where You Stand?
\If you’re ready to start organizing your facility information, our Church Facility Asset Inventory & Assessment Guide & Templates provides a simple, step-by-step way to document your building assets and their condition. And if you want clarity on how asset inventory fits into your broader facility management plan, our free Facility Management Self-Assessment helps you evaluate what’s in place, what’s missing, and what should come next.